DJ asked for information about making this style of custom font.
Pdf guide:
Attachment:
 Trough Guide.pdf [1.16 MiB]
Downloaded 61 times
Trough Guide.pdf [1.16 MiB]
Downloaded 61 times
A quick guide to making custom fonts with troughs or recessed interior sections like these:

This guide assumes that you are familiar with custom font tools and that you are using Gimp 2.10. You will need to use the following custom font plug-ins to achieve the basic style:
Custom Font Embossible
Custom Font Layer Utils
Custom Font FaceMaker
WorkflowUse Embossible to give a white custom font a boxed edge.
Add colour to this and save.
Use the ‘Trim’ option in Layer Utils to remove the edges from the box characters: this will become the recessed or trough area.
Save this with another name.
Use the Embossible ‘Flat’ emboss option with the opposite azimuth value to that used for the ‘Box’ characters.
Add colour/pattern to this and save.
Use FaceMaker to combine the ‘Box’ and ‘Trough’ custom font files.
Step 1: Choose the white custom font base to work with (use the Whitebase link in my signature on GimpChat to find one if you need to) and open the file in Gimp 2.10.
Step 2: Open the Embossible plug-in and use the values shown in the image below to create ‘box’ characters from plain white characters before clicking ‘OK’.
Filters>>Custom Fonts>>Constructing Tools>> Custom Font Embossible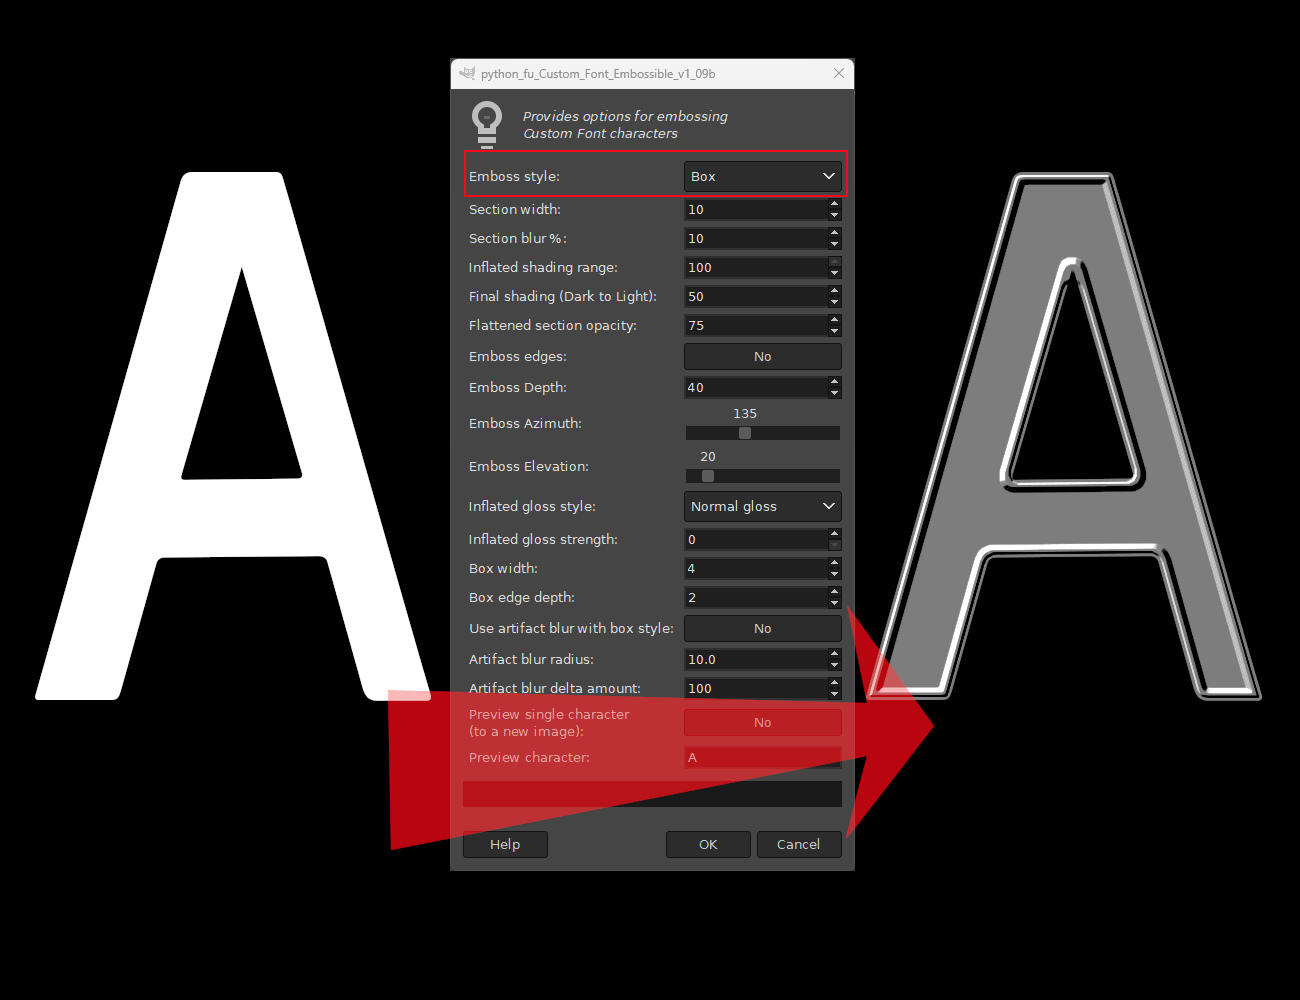 Step 3:
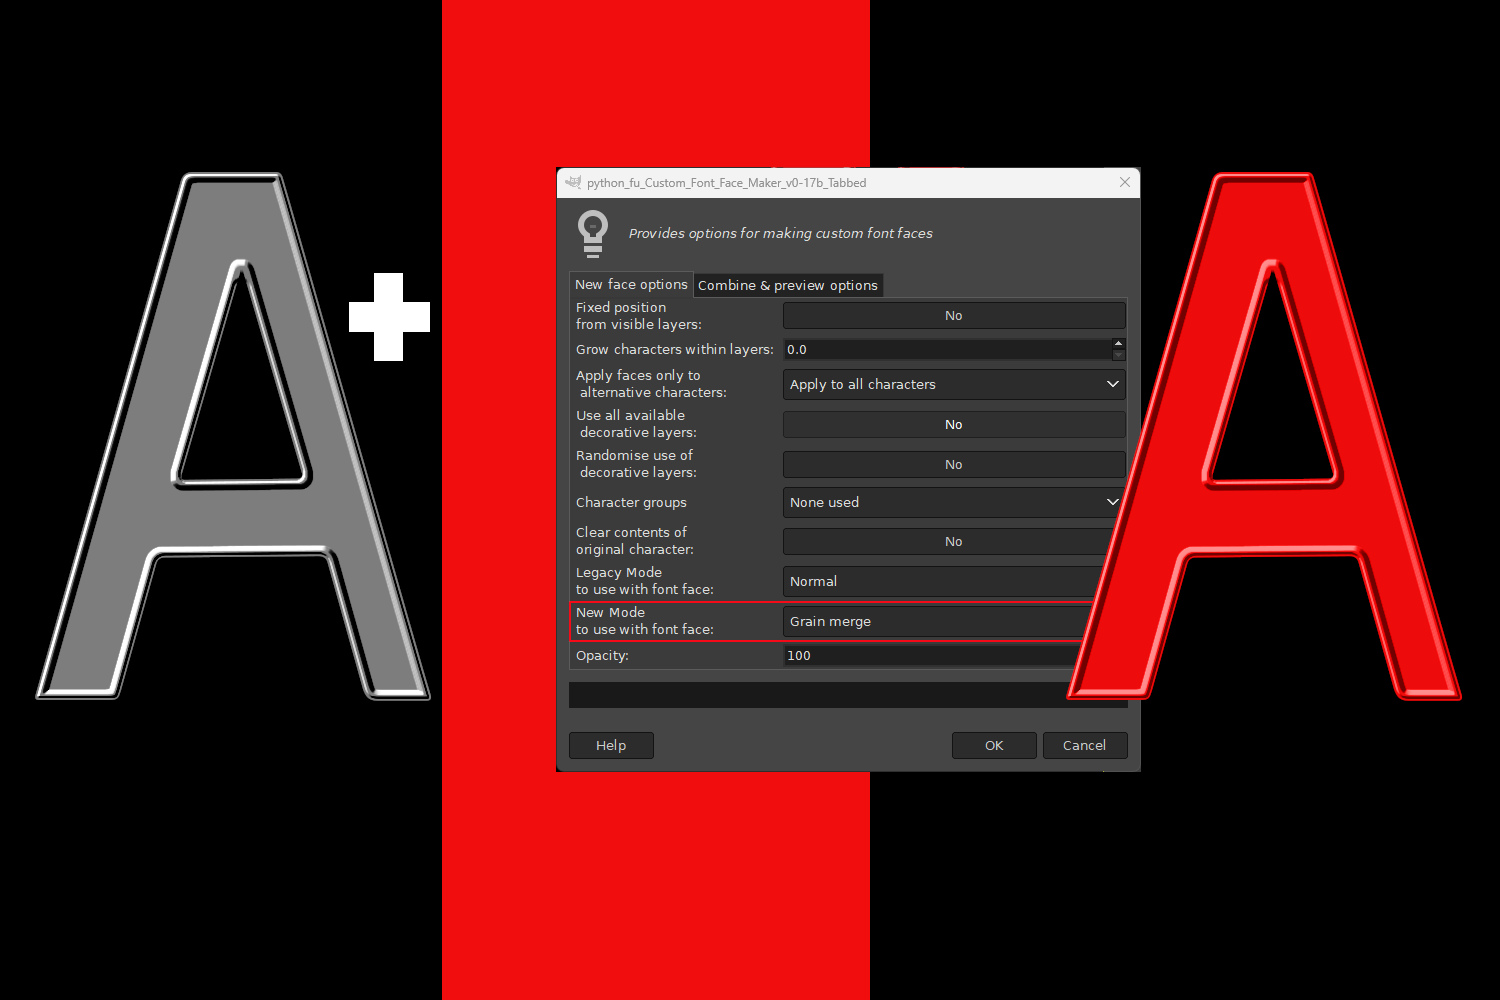
 At this point you would add colour/texture to the characters by adding a layer with the colour to the file and use Custom Font FaceMaker to apply that to all the characters in the file.
 Step 4:
 Save the file with your chosen name.
Step 5: Open Custom Font Layer utils:
Filters>>Custom Fonts>>Utility Tools>> Custom Font Layer UtilsUse the ‘Trim’ option on Tab 3 of the filter with the value shown (this should work if you used the values used in Step 2) and click on ‘OK’.
 Step 6:
 Open the Embossible plug-in again and enter the new values shown below before clicking on ‘OK’.
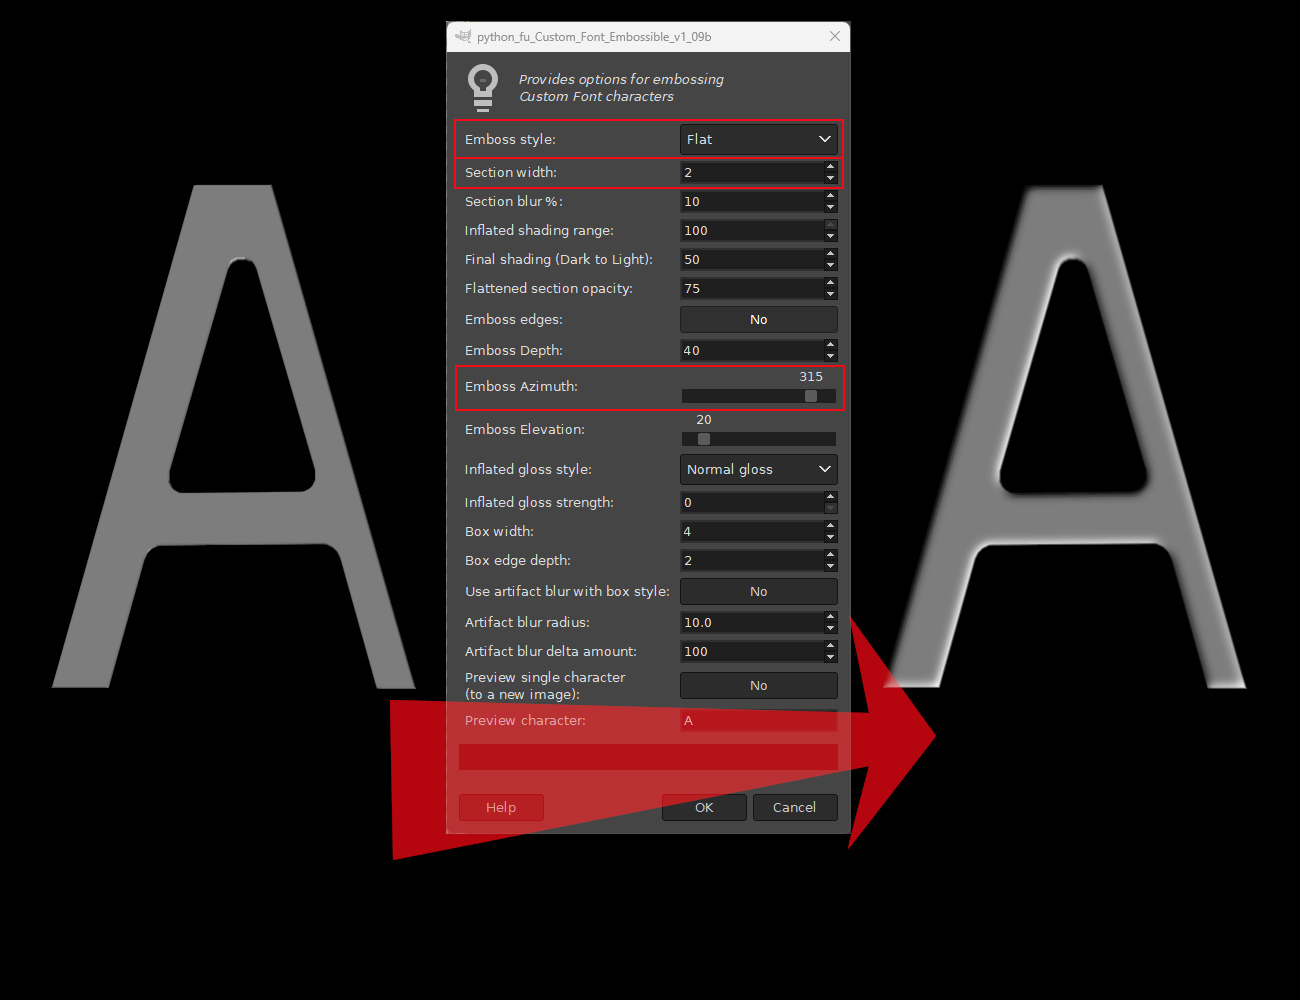
If you changed the value of the ‘Emboss Azimuth’ option in Step 2 you will need to calculate the new value to enter (add 180 to that amount and subtract 360 if necessary).
Step 7: At this point you would add colour/texture to the characters by adding a layer with the colour to the file and use Custom Font FaceMaker to apply that to all the characters in the file.
 Step 8:
 Save this file with a new (temporary) name. I named mine ‘Temp’!
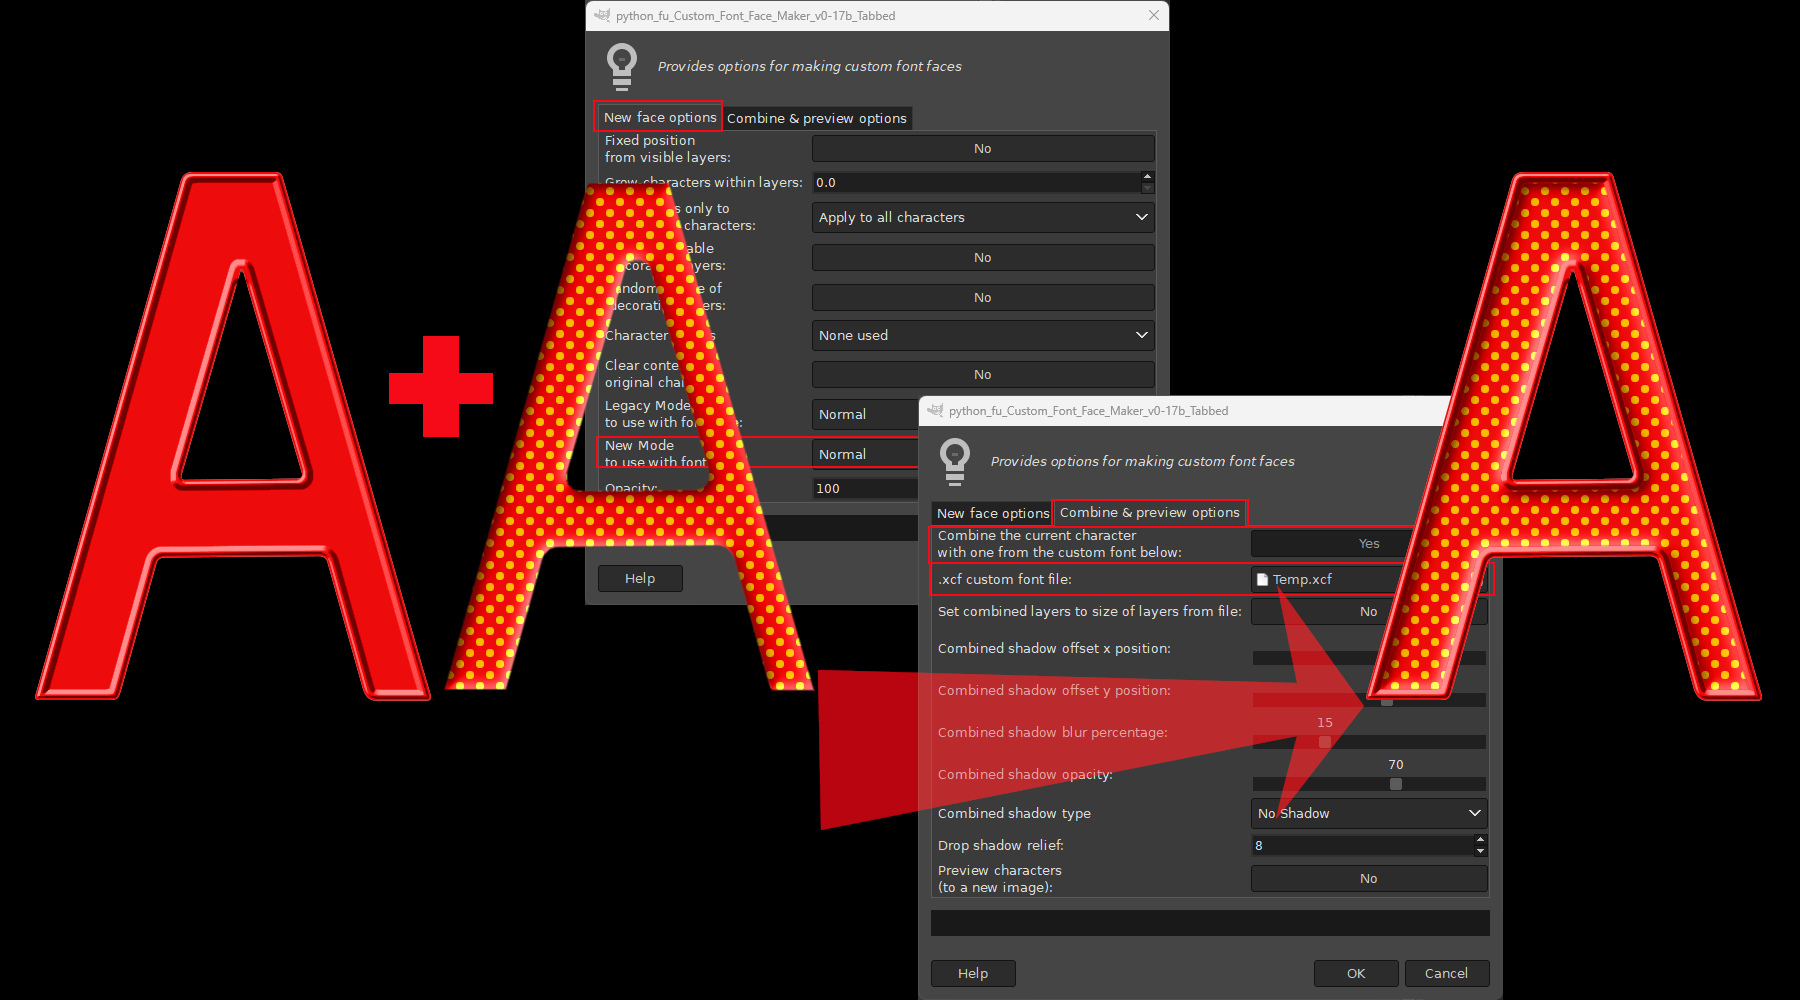
Step 9: When you have the two finished custom font files – the box and the trough files – open the box version in Gimp, if it is not already open, and call up Custom Font FaceMaker:
Filters>>Custom Fonts>>Decorating Tools>> Custom Font FaceMakerStep 10: Make sure that the mode is set to ‘Normal’ on Tab 1 of the dialog. On Tab 2 click on the Folder icon of the ‘.xcf custom font file’ option and navigate to the location where you saved the temporary trough file and select the file. Set the ‘Combine the current character’ option to ‘Yes’. Click on ‘OK’ to combine the files.
Job done – have fun!