This came about after I recently came across a redundant link to the subject...

Attachment:
 Panels.pdf [1.56 MiB]
Downloaded 1009 times
Panels.pdf [1.56 MiB]
Downloaded 1009 times
This guide contains a lot of text – I apologise to non-English speakers. The guide assumes that you are familiar with custom fonts and that you have a custom font base to work with.
You will need to use the following Custom Font Filters (you can download the latest versions by clicking on the link from my signature on GimpChat).
Custom Font FaceMaker
Custom Font Layer Utils
Custom Font Embossible
Part 1: Use Embossible to create the box characters to contain the smaller panels. This could be an existing set of characters or you could use Embossible to create the container set of characters. Use one of the options from the drop down menu when you click on the Emboss style option.
The first part uses characters where the thickness of the strokes is constant throughout all parts of the characters.

Save the characters for use later but keep the file open in Gimp for the next step.
Part 2: Create embossed panelsOpen Custom Font Layer Utils and set the trim value on Tab 3 of the dialog to turn the characters into smaller panels.
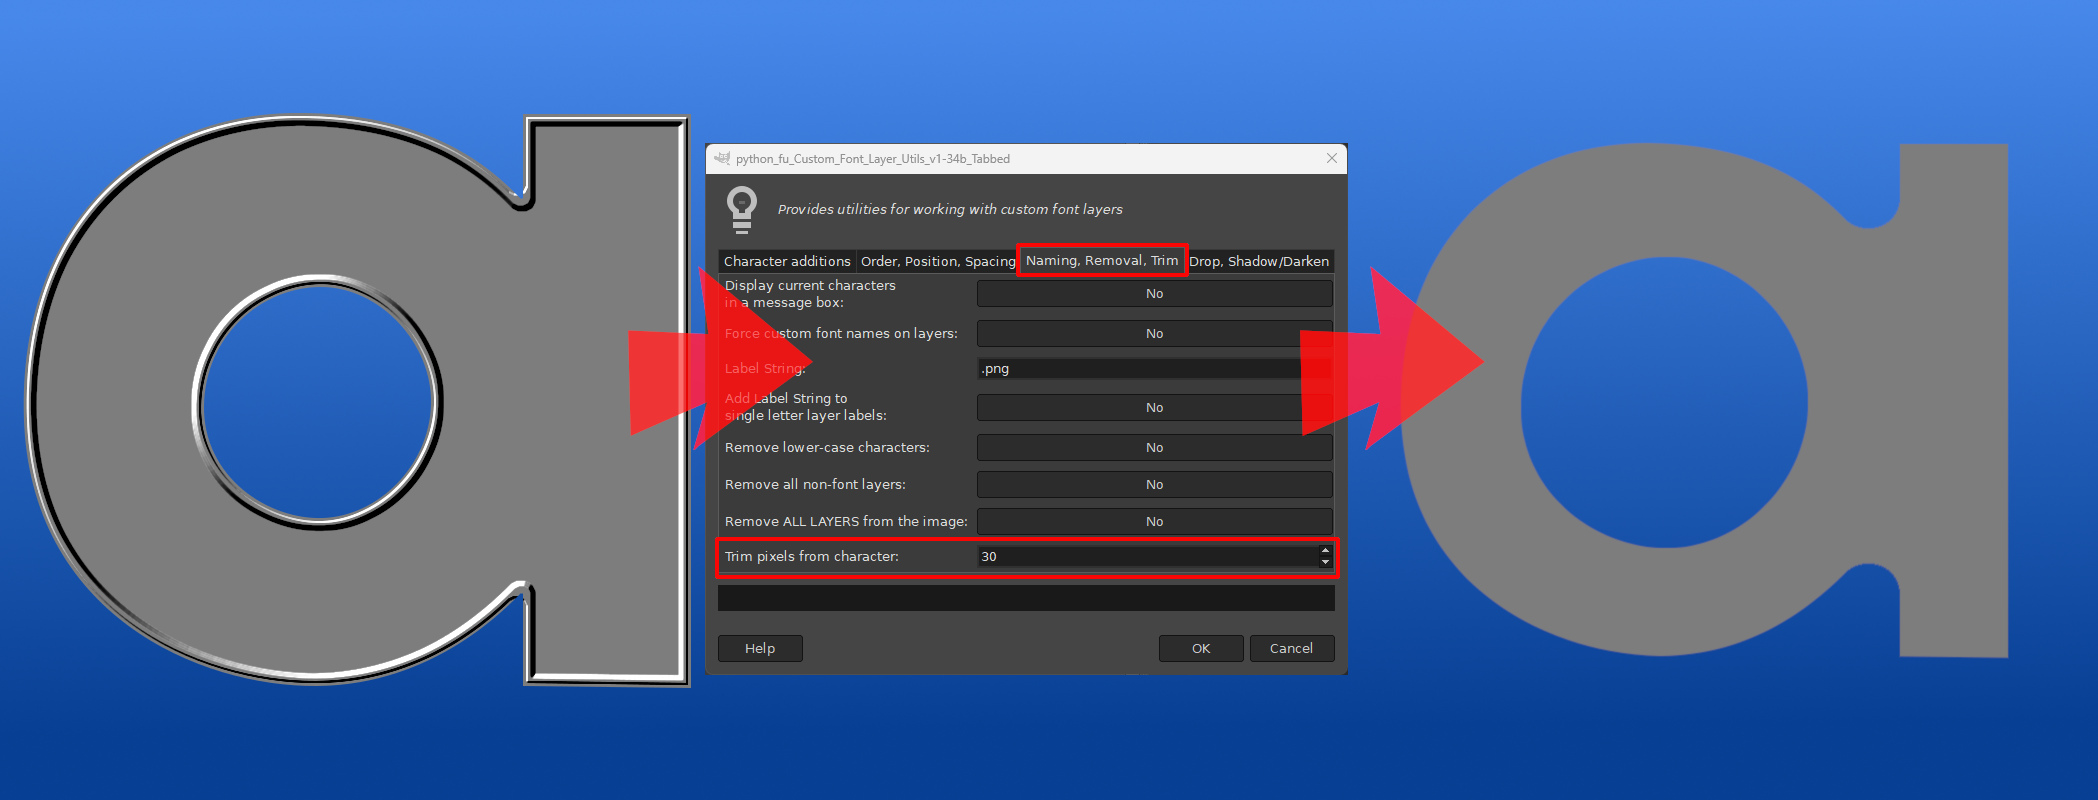
If you are happy, save the new panel characters with an appropriate name. If not, hit undo and use a different value for the trim.
Embossing the panel
Open Embossible and set the ‘Emboss style’ to ‘Flat’ (‘Rim1’, ‘Rim2’ and ‘Box’ also work well). You may want to adjust the ‘Section width’ value if your panel is on the narrow side.

Save the panel characters with a suitable name for use later.
At this point you could add some décor to the two sets of characters (the box set and the panel set) with FaceMaker or you could combine the two sets of characters with FaceMaker and then apply décor or add further embellishments.
Return to (or re-open) the Box characters and use FaceMaker to combine the two character sets using the options on tab 2 of the dialog; make sure that you use Normal mode on tab 1.
You can see that I had used a temporary name for my panel version of the characters.
My combined output:
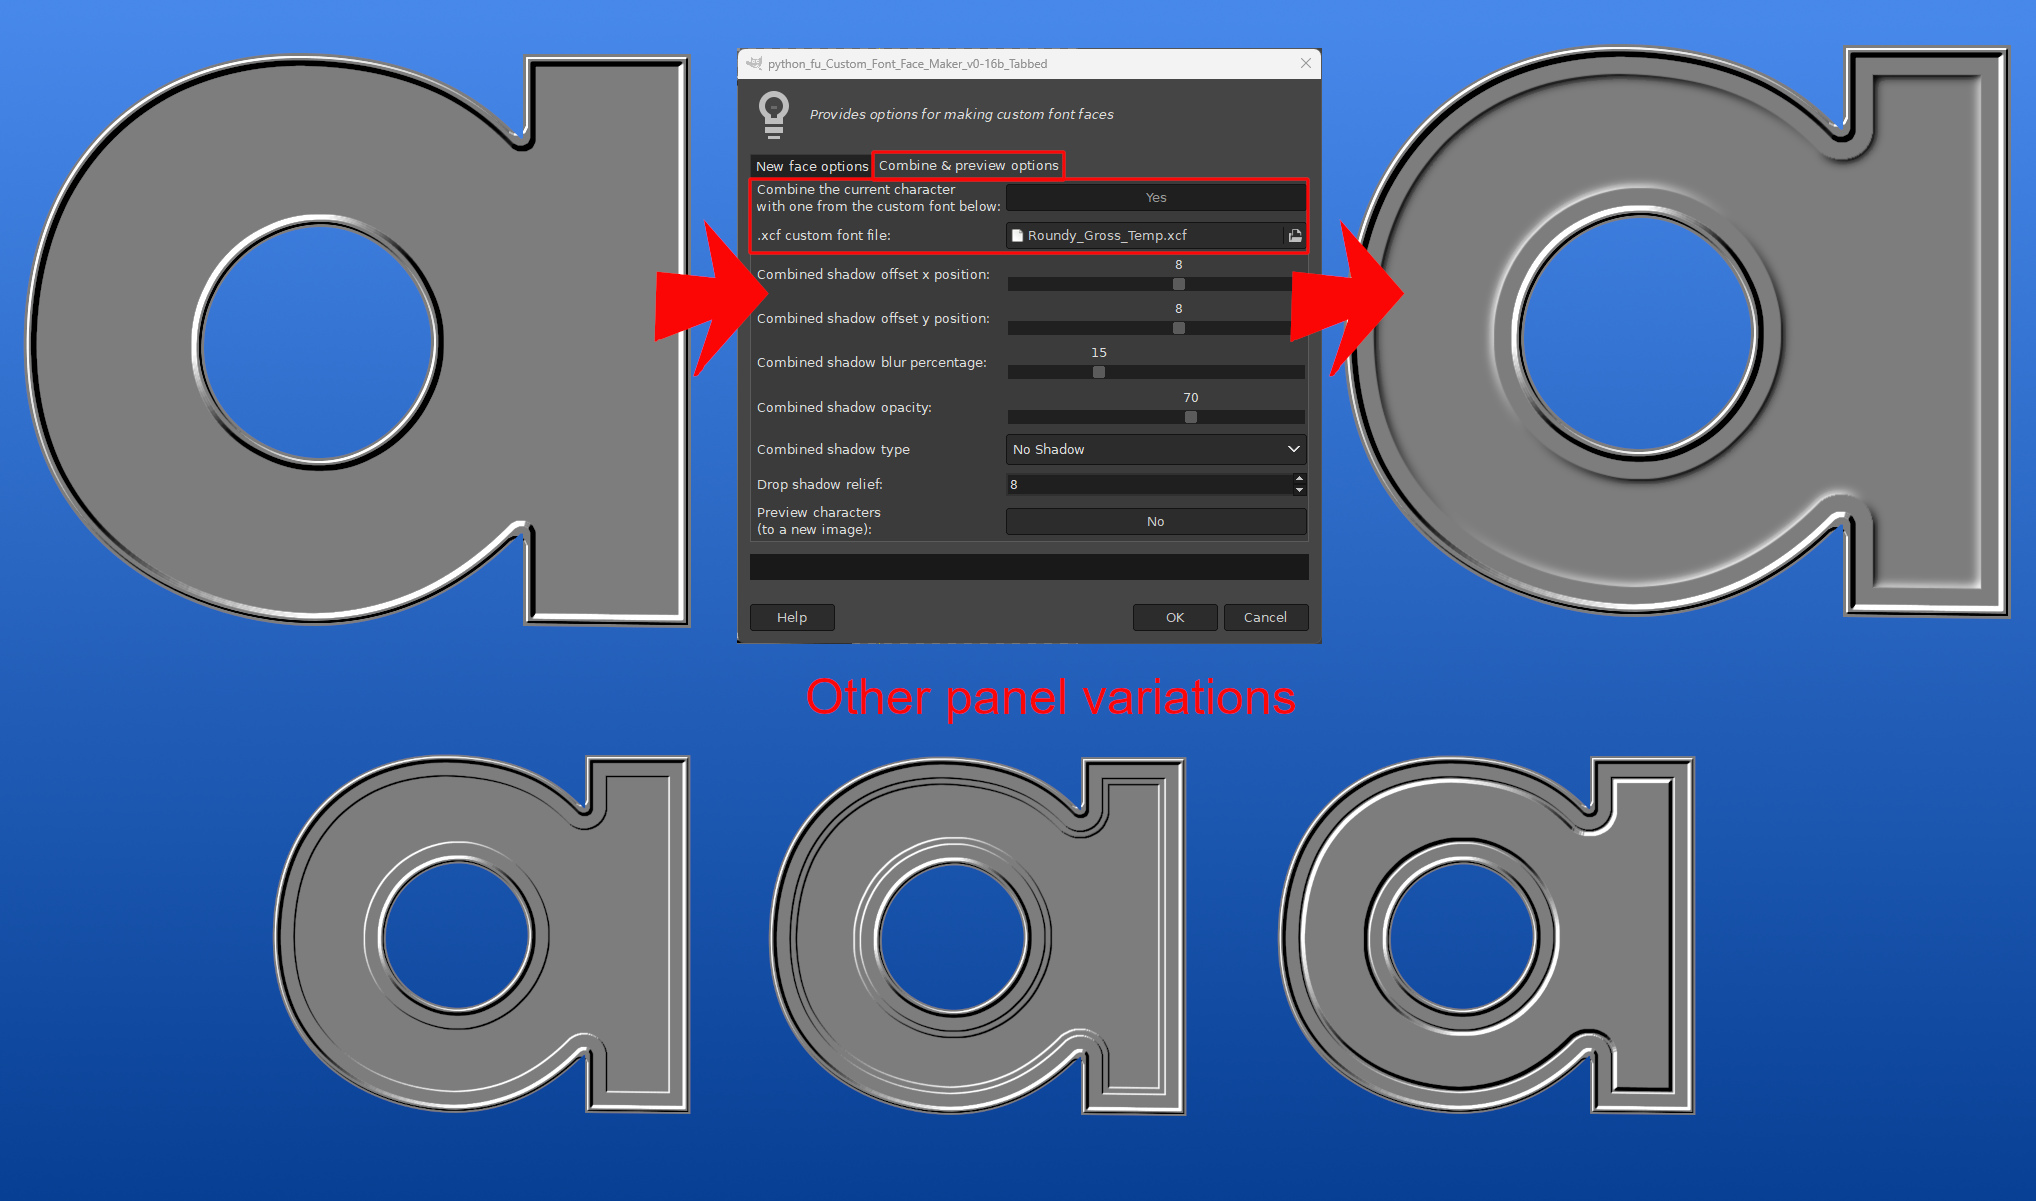
If you have not already applied décor to the two character sets now is the time to use Facemaker again to apply a coloured layer to the new characters.
I used a simple red gradient layer and Grain merge mode with FaceMaker below:

Part 3: Embossed Panels inside panels
This time I want to apply the panels to a font where the characters have thicker and thinner sections.
Once again you can add décor when the embossed panels have been combined or before combining. You can start with the full character or use a box character to define the edges. My example uses a box character as the starting point.
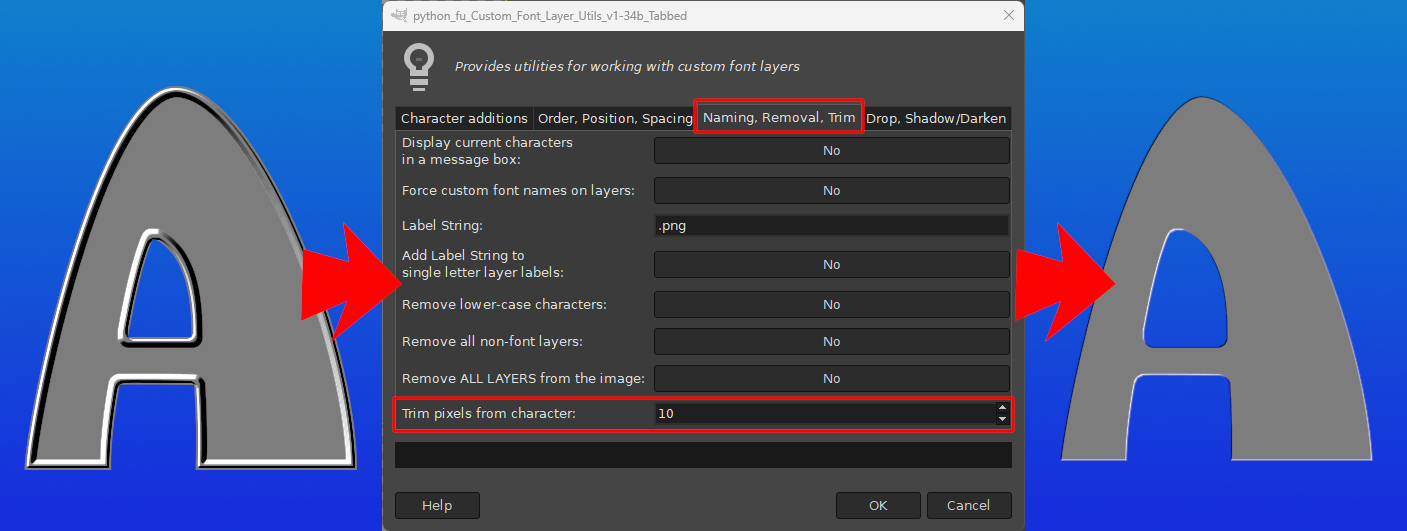
Open your box characters (Part 2 shows you how to make them) and use the option on Tab 3 of Custom Font Layer Utils to trim the border from the characters (adjust the value used for your own needs):
Use the Embossible plug-in to create a set of embossed characters using the ‘Flat’ emboss style:
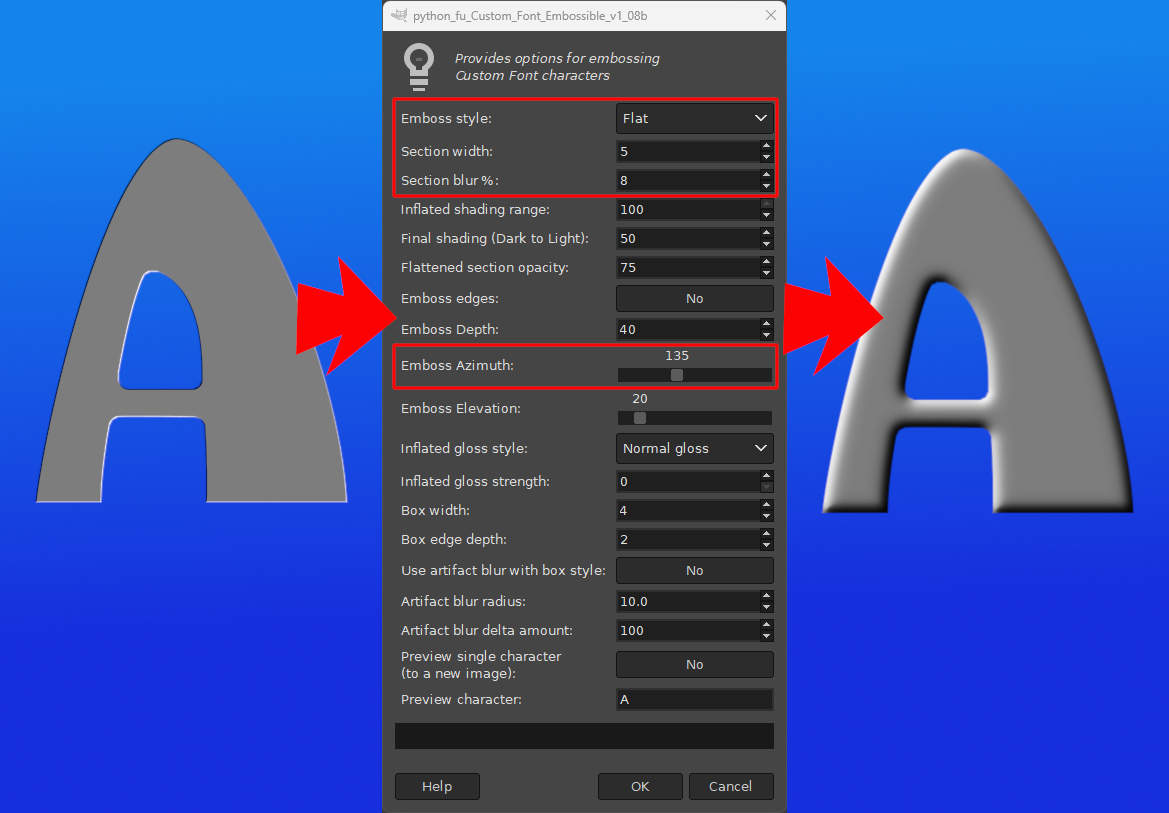
Make a note of the azimuth value that indicates the direction of the light; in my case 135 degrees.
It’s probably a good idea to save the file at this point; you could also add some décor at this stage if you are thinking of treating each panel differently.
If this is not the case, you can combine the box and flat panel using Custom Font FaceMaker; keep the mode as ‘Normal’ on Tab 1 of the dialog and use the combine options on Tab 2.

Use the Layer Utils trim option again with this new set of characters to create a smaller set of character panels. The aim is to trim enough off so as to completely lose the thinner sections of the characters; you may want to work on a single layer (Edit>>Copy then Edit>>Paste as>>New Image) to find the value that works for you.
It may be a good idea to check through the layers and remove any ‘stray’ unwanted areas that have been left un-trimmed.
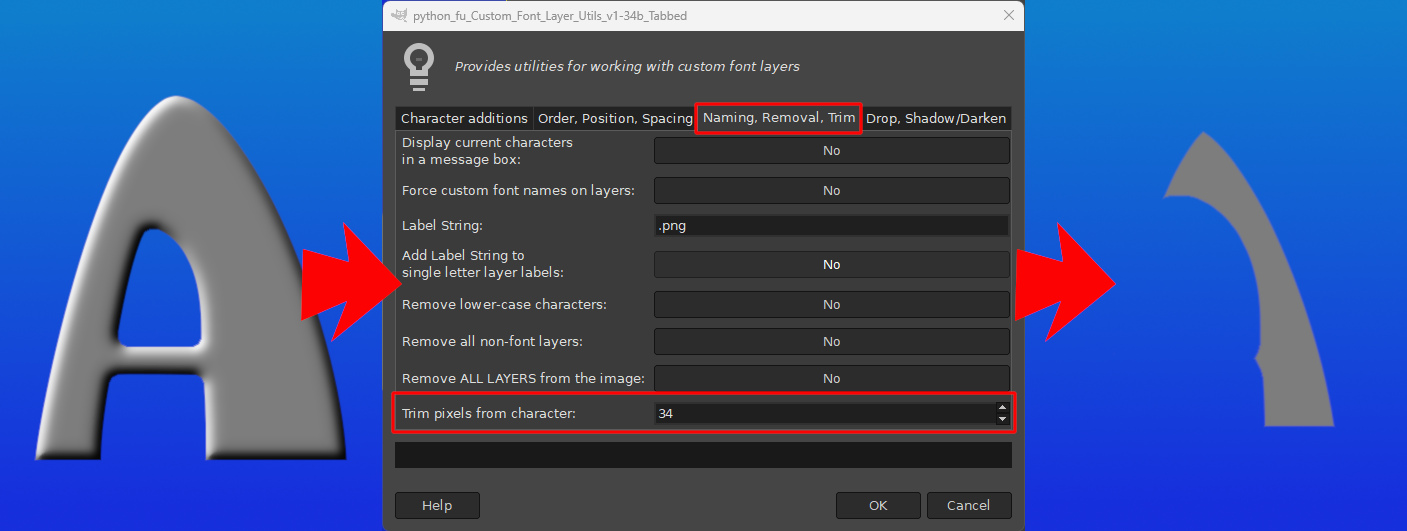
Use the Embossible filter to add a flat emboss to this new set of panel characters. You may also want to adjust the section width now. Change the azimuth value to send light in the opposite direction across the embossed character. If you are not sure about this new value, add 180 to the original number; If that value is larger than 360, subtract 360 from it. (My original azimuth was set to 135 so 135 + 180 = 315.)
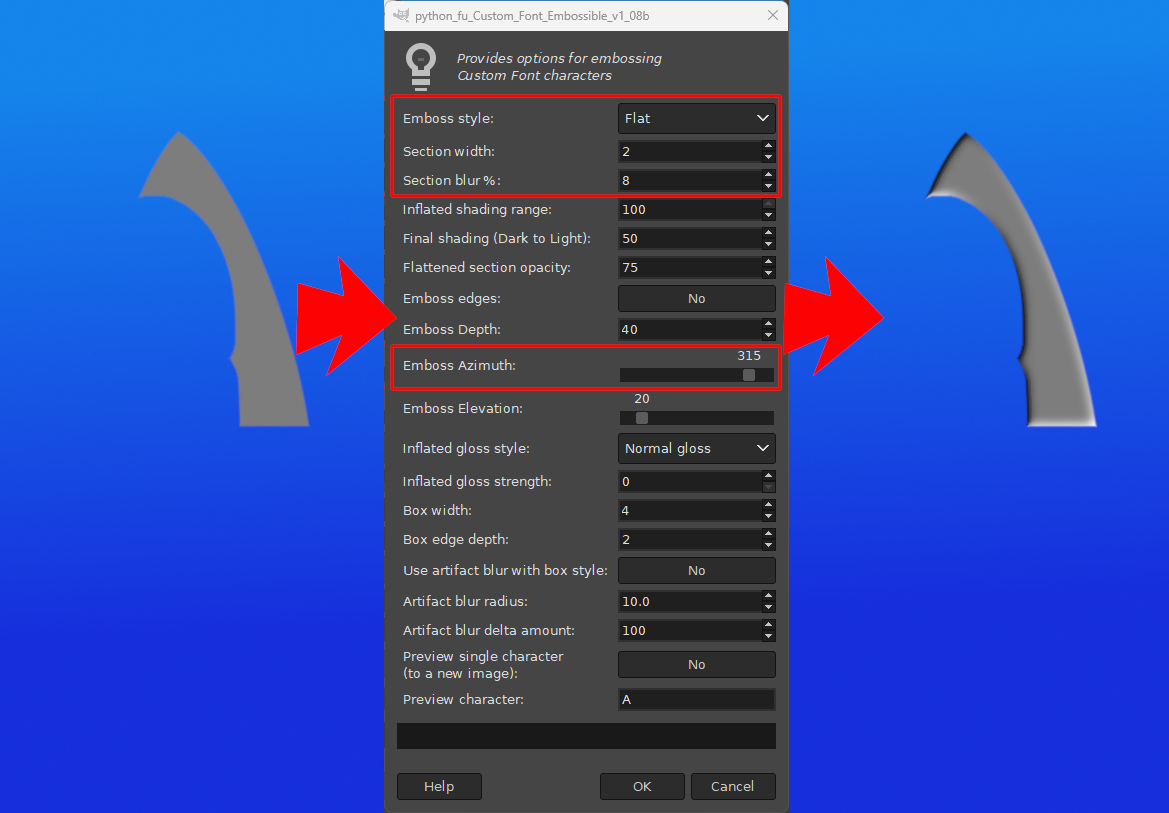
f you want to add a different style of décor to the panels do this now.
Save the new panel characters to combine in the next step.
Return to, or re-open, the main custom font file and use FaceMaker again to combine the panel file.
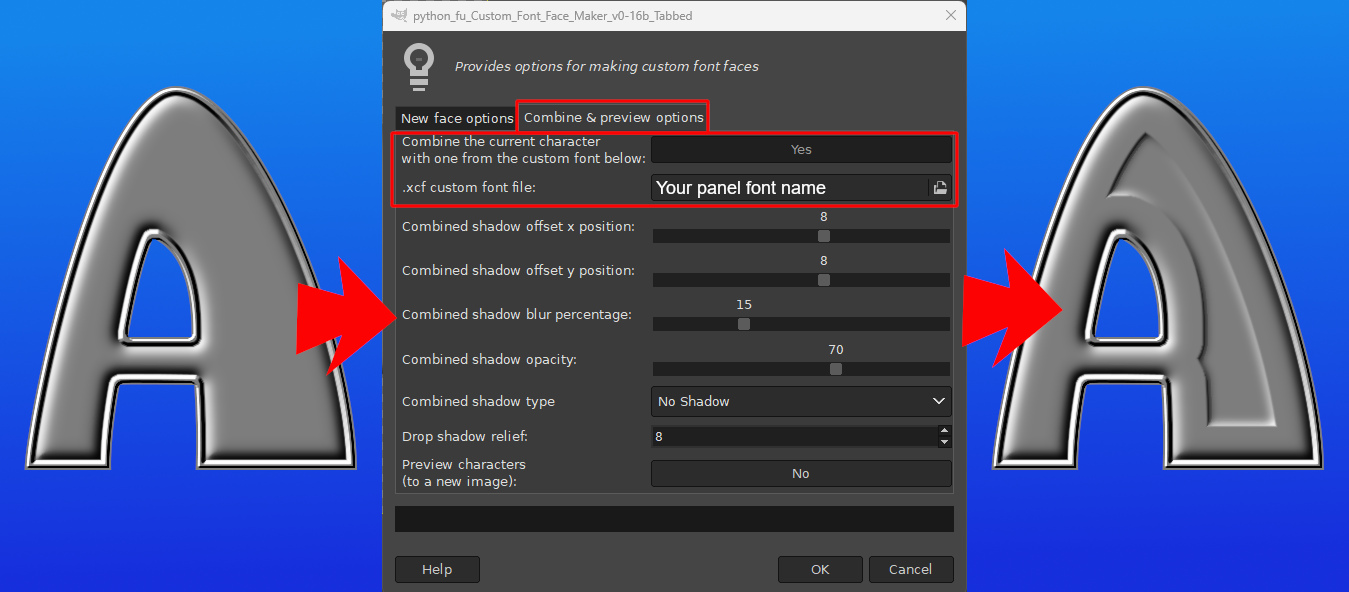
Now we can see the effect taking shape (pardon the pun)...
If you have the will-power to continue you can even add further smaller panels by trimming the panel characters...

and giving the result a flat emboss before combining again.

As you can see my example is awaiting a final décor finish...
And finally, another example of panelling using the inflated and gloss styles with the Embossible filter:
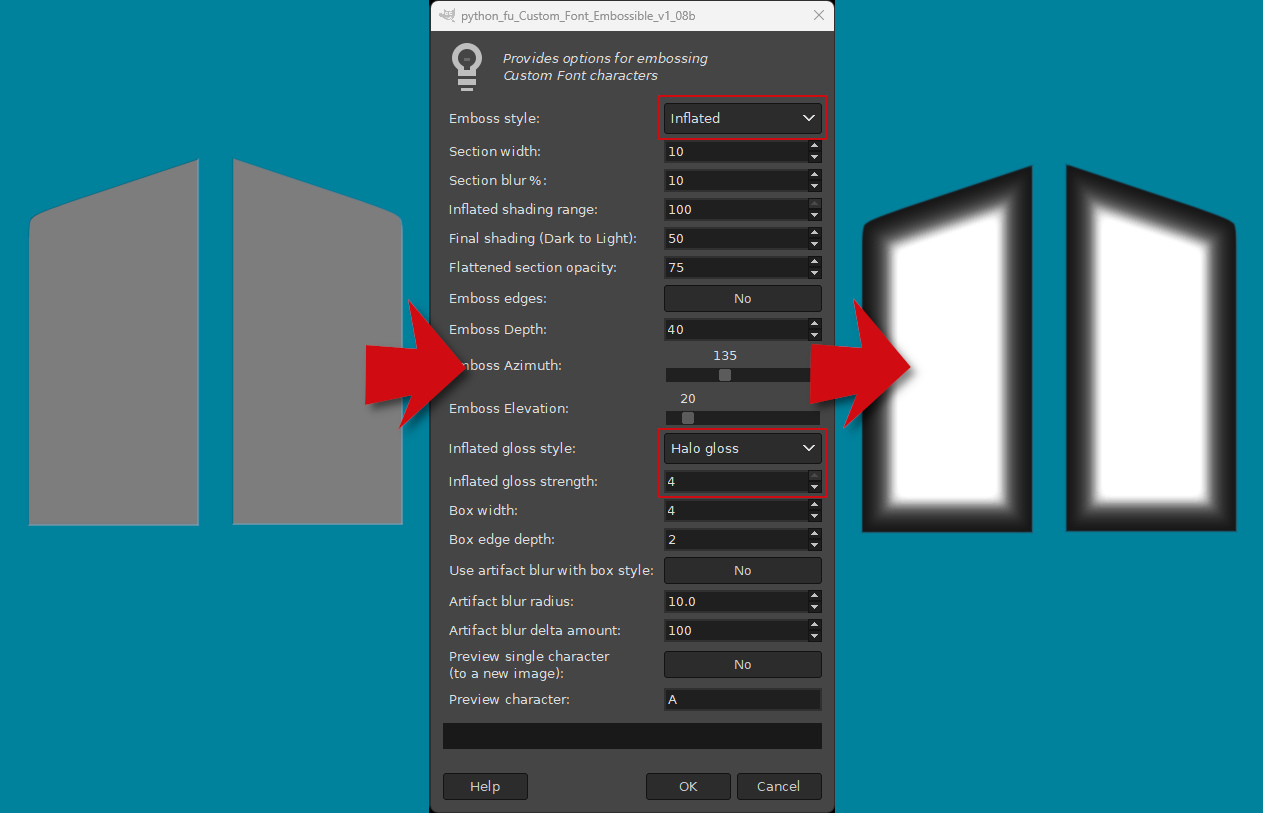
and then using FaceMaker to add colour.

 Login
Login Register
 Tweets
 FAQ
FAQ Advanced Search





