It is currently Sat Aug 08, 2026 8:11 am


All times are UTC - 5 hours [ DST ]


Post new topic Reply to topic  [ 11 posts ] 
Author Message
 Post subject: Custom railing script
PostPosted: Sun May 20, 2018 12:43 pm  (#1) 
Offline
Script Coder
User avatar

Joined: May 07, 2014
Posts: 4527
Location: Canada
This is more fun than custom font (at least I think so).

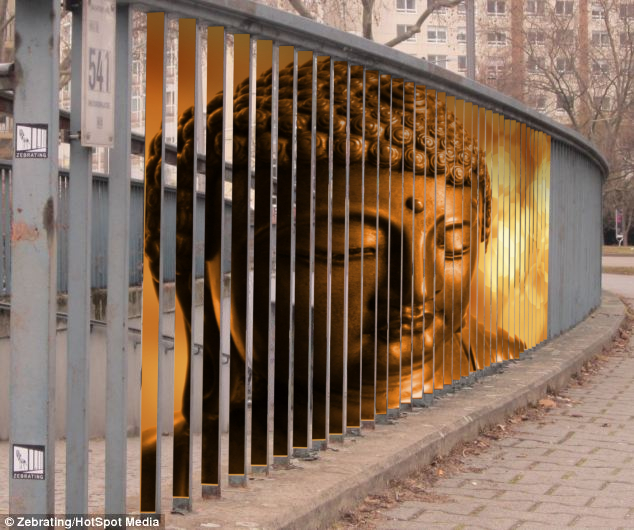
You can use this script to slap any image on top of a railing definition file (works similarly to custom font file where you can define your own railing definition .xcf file).

I have created a railing definition file as example and here i just ran script to slap image of buddha statue on the railing definition file...and this is what you get.
Image

More details here-> Custom railing script for GIMP

_________________
TinT


Share on Facebook Share on Twitter Share on Orkut Share on Digg Share on MySpace Share on Delicious Share on Technorati
Top
 Post subject: Re: Custom railing script
PostPosted: Sun May 20, 2018 2:46 pm  (#2) 
Offline
Script Coder
User avatar

Joined: May 07, 2014
Posts: 4527
Location: Canada
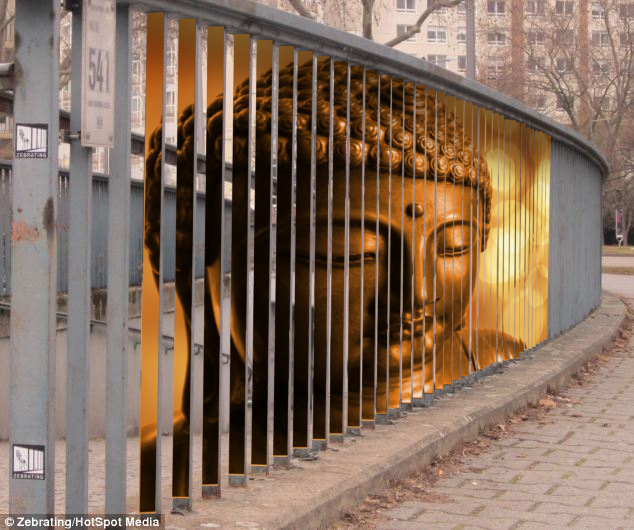
Version 2 of script uses first 3 points of defined paths (point 4 is calculated based on first 3 points) produces better aligned railings.
Image

_________________
TinT


Top
 Post subject: Re: Custom railing script
PostPosted: Sun May 20, 2018 2:52 pm  (#3) 
Offline
GimpChat Member
User avatar

Joined: Mar 23, 2012
Posts: 7388
Location: Göteborg at last!
That looks like a lot of fun. How does a railing definition file work?


Top
 Post subject: Re: Custom railing script
PostPosted: Sun May 20, 2018 5:08 pm  (#4) 
Offline
Script Coder
User avatar

Joined: May 07, 2014
Posts: 4527
Location: Canada
it IS a lot of fun... :D
here's how the railing definition file is created: How to create custom railing definition file
I wrote this for version 1 of script. For version 2, you can define 4 points it just won't use the 4 th point and calculate it from the first 3 points (of each railing) and creates much more aligned result.

_________________
TinT


Top
 Post subject: Re: Custom railing script
PostPosted: Sun May 20, 2018 6:15 pm  (#5) 
Offline
Script Coder
User avatar

Joined: May 07, 2014
Posts: 4527
Location: Canada
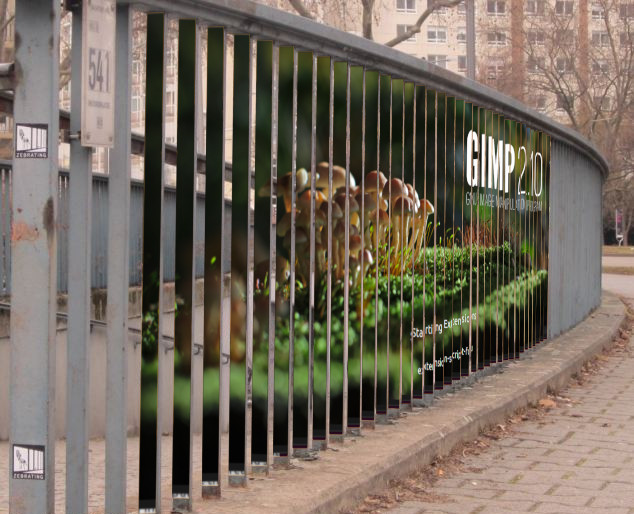
Just tested in GIMP 2.10 (Ubuntu flatpak installation).
Success.
Image

_________________
TinT


Top
 Post subject: Re: Custom railing script
PostPosted: Thu Feb 20, 2025 12:45 pm  (#6) 
Offline
GimpChat Member
User avatar

Joined: Jan 06, 2020
Posts: 401
Location: The Netherlands
Finally I found this one again. Just don't remember how it works!


Attachments:
custom railing.zip [2.02 KiB]
Downloaded 1278 times
Top
 Post subject: Re: Custom railing script
PostPosted: Fri Feb 21, 2025 1:47 pm  (#7) 
Offline
GimpChat Member
User avatar

Joined: Aug 08, 2016
Posts: 2855
Location: East Midlands of England
trandoductin wrote:
This is more fun than custom font (at least I think so).

:clap

_________________
Image
"Let no one steal your dreams."
Paul Cookson

Custom Font Links
2.10 Tools
Character Paths
White Bases


Top
 Post subject: Re: Custom railing script
PostPosted: Sat Feb 22, 2025 5:33 am  (#8) 
Offline
GimpChat Member
User avatar

Joined: Mar 01, 2014
Posts: 14111
Location: Spain, Aragón
Thanks for the plug-in.
:tyspin Jappaloe63, too.
I don't remeber how it works. Tin, can you help? Thanks in advance. :tyspin

_________________
Image

Gimp 2.10.30(samj) portable _ OS Windows 10 Home_ 64bits
Don’t be afraid to start over. It’s a new chance to rebuild what you want.


Top
 Post subject: Re: Custom railing script
PostPosted: Sat Feb 22, 2025 7:17 am  (#9) 
Offline
GimpChat Member
User avatar

Joined: Jan 06, 2020
Posts: 401
Location: The Netherlands
Could someone tell me how this works?


Top
 Post subject: Re: Custom railing script
PostPosted: Sat Feb 22, 2025 1:03 pm  (#10) 
Offline
GimpChat Member
User avatar

Joined: Dec 09, 2018
Posts: 736
Jappaloe63 wrote:
Could someone tell me how this works?

I haven't seen this one before so don't have Tim's instructions, but from reading the code:

Menu: Python-Fu -> Custom Railing

Run the plugin on the layer containing the picture you want to put on the railings.

In the plugin dialog box, you need to give it:

".xcf railing file:"

Enter the .xcf image that is your railings file, the plugin will load this image.
This is a second image that defines the railings.
The plugin will use the active layer from this image which should be a picture of railings.
The image also needs to contain paths that define where the railings are.
If you don't have Tim's example .xcf railings file you will need to find your own railings picture and make the paths by hand.
It only uses the first stroke in the path so you need to make one path for each rail.
It uses specific anchors of a path:
1st anchor: Top left corner of one rail.
2nd anchor: Top right corner of the rail.
3rd anchor: Bottom right corner of the rail.
4th anchor: You can skip this if you have chosen "Use 3 Points instead of 4 (Calculate 4th points):" Otherwise it should be the bottom left corner.

"Use 3 Points instead of 4 (Calculate 4th points):" is explained above.

What the plugin does:

Makes a new image and puts the railings picture onto the new image.
Copies a slice from your picture to the new image.
Transforms the perspective of the slice to match a rail as defined by an above path.
Repeats the copy slice and transform for each of the other rails.

PS: Forgot to say the paths should be the order: From top of the paths dialog down should be rails from right to left.


Top
 Post subject: Re: Custom railing script
PostPosted: Sat Feb 22, 2025 3:16 pm  (#11) 
Offline
GimpChat Member
User avatar

Joined: Jan 06, 2020
Posts: 401
Location: The Netherlands
Thank you for your explanation ... Go see if it will work


Top
Post new topic Reply to topic  [ 11 posts ] 

All times are UTC - 5 hours [ DST ]


* Login  


Powered by phpBB3 © phpBB Group