It is currently Sat Oct 03, 2026 4:21 am


All times are UTC - 5 hours [ DST ]


Post new topic Reply to topic  [ 29 posts ]  Go to page Previous  1, 2
Author Message
 Post subject: Re: How to clean this picture
PostPosted: Fri Feb 22, 2013 8:43 pm  (#21) 
Offline
GimpChat Member
User avatar

Joined: Sep 24, 2010
Posts: 12850
I use Win7 64-bit and 64-bit GIMP Akros (went from 32-bit to 64-bit GIMP when I upgraded from 2.6x to 2.8x). Shellout works in both version of GIMP and in Win7. You have to read through the thread, unfortunately, since there's details on how to edit the python file for Windows which is unique to Windows (like using the double backslash for paths such as c:\\program files\\etc.) that is not intuitive at all. You need to do this to add the paths for the programs that you want XNViewshell, uh,er, Shellout (I know; insider joke) to launch. As a side note, Shellout can call Photoshop and return it's result back to GIMP; how cool is that? Yes, you have to have python enabled GIMP which is not done so by default when you install GIMP, but that's a completely different subject. :)

_________________
Lyle

Psalm 109:8

Image


Top
 Post subject: Re: How to clean this picture
PostPosted: Sun Feb 24, 2013 10:22 am  (#22) 
Offline
GimpChat Member

Joined: Oct 31, 2011
Posts: 112
rich2005 wrote:
You can get carried away with technicalities and overlook the obvious.

The first thing I thought was 'fast-fourier-transform' (maxed out the cpu with this one, lol) or maybe a 'wavelet-denoise'
but a simple filters -> generic -> erode works just as well with this image. The face and the hands do suffer, so work on a duplicated layer then add a layer mask and restore those areas.


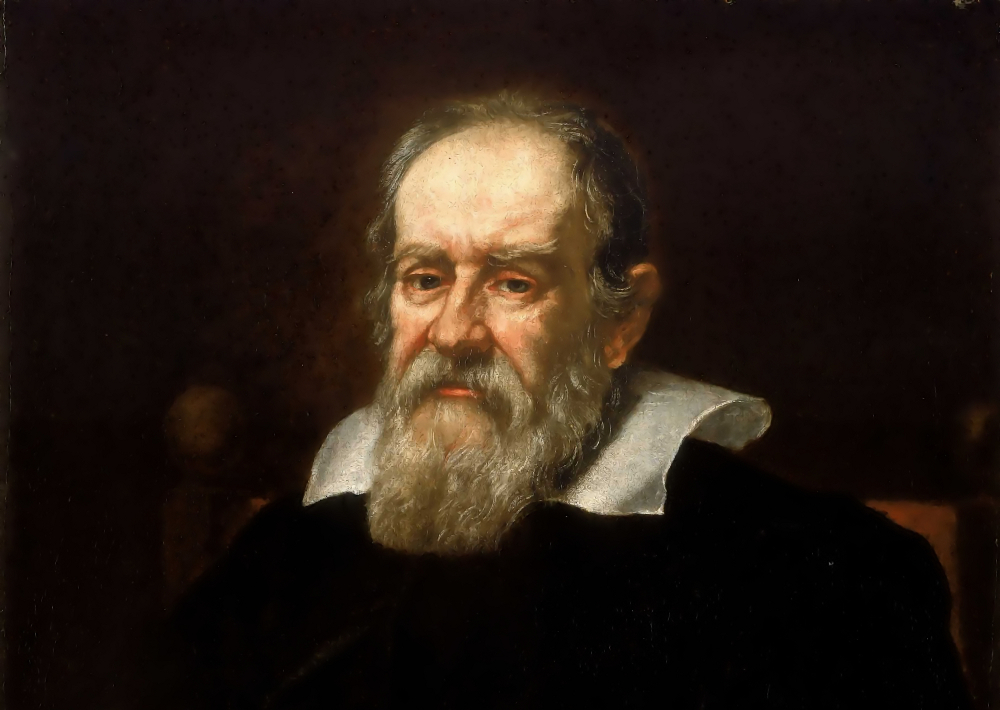
wwwooooowww, thank you for your suggestion. The erode filter is top notch :D. I didn't even realize that filter exists before you told me LOL.

Below is my result. After I apply erode filter (masking hands and face), I apply bilateral filtering and anisotropic smoothing. Should have done once more for the grain in the background.

Attachment:
galileo galilei.jpg
galileo galilei.jpg [ 429.53 KiB | Viewed 2365 times ]


Top
 Post subject: Re: How to clean this picture
PostPosted: Sun Feb 24, 2013 10:25 am  (#23) 
Offline
GimpChat Member

Joined: Oct 31, 2011
Posts: 112
PhotoComix wrote:
Done a detail to show the effect at original size

............................

PS then to make more similar to the original would be possible add some grain
Except that original painting should have no any "grain" but brush strokes that were no visible in the photo ... :lol


Thank you very much for your help. The result looks amazing. You even preserve some graini-ness. My result looks very much like painting (too smooth) :D


Top
 Post subject: Re: How to clean this picture
PostPosted: Sun Feb 24, 2013 10:27 am  (#24) 
Offline
GimpChat Member

Joined: Oct 31, 2011
Posts: 112
Both of them are fine. My result looks too smooth. but there is someone else who can preserve the grain :D

anarkhya wrote:
sallyanne wrote:
Have worked on a few older pictures that were spotted or creased and by using the cloning method have been reasonably successful at getting rid of most impurities without giving the photo a completely different look.


+1 here!
...But it depends on the desired purpose, question is: smooth re-render or grain preservation ?
Question is asked to hanciong.


Top
 Post subject: Re: How to clean this picture
PostPosted: Sun Feb 24, 2013 10:29 am  (#25) 
Offline
GimpChat Member

Joined: Oct 31, 2011
Posts: 112
lylejk wrote:
No one technique work (i.e., don't ask; lol. OK; some hints. Anisotrophic smoothing, bilateral filter, and gausean blur (9pix) using edge detect to amplify the specs for a mask. Then additional manipulations such as selective smudging and clone/heal brush). Still had some fine cracks that shown, so hid most of that with using a Virtual Photographer preset which added glow to the piece (and dupped that layer separating light and dark with various opacities). Can use some more tlc, but I tire after spending more then 25 minutes. lol

:)


Thank you lyle. the result looks great. :D


Top
 Post subject: Re: How to clean this picture
PostPosted: Sun Feb 24, 2013 10:30 am  (#26) 
Offline
GimpChat Member

Joined: Oct 31, 2011
Posts: 112
Iain wrote:
I used Iain's Noise Reduction G'MIC filter as a first pass to remove low level noise. The spots and cracks remain. Then I created a new layer with a small radius median filter to remove the small cracks and spots on the dark areas using a mask. Then a another layer with a wider median filter, set to darken only, and more masking to remove the bigger cracks. And the last layer is duplicated, set to lighten only, and the mask edited so that the dark marks on the skin are removed. Finally I used the original image, with a mask to replace some of the areas that were obviously degraded.


and yet another method. Thanx for the effort. I don't understand some words you are using here, so I think I will ask again :D


Top
 Post subject: Re: How to clean this picture
PostPosted: Sun Feb 24, 2013 10:28 pm  (#27) 
Offline
GimpChat Member

Joined: Feb 13, 2013
Posts: 86
hanciong wrote:

and yet another method. Thanx for the effort. I don't understand some words you are using here, so I think I will ask again :D


'Median filter' is basically Despeckle with Black Level set to -1 and White level set to 256. Although I used the 'recursive median filter' in G'MIC.


Top
 Post subject: Re: How to clean this picture
PostPosted: Sat Oct 05, 2013 12:57 am  (#28) 
Offline
GimpChat Member
User avatar

Joined: Jan 10, 2013
Posts: 863
I used the same technique seen in the video David Pat. Not applied on the fifth layer (scale5) Heal Selection. In the end I applied a mask.
Image
I did not use any other filter.
Video - http://youtu.be/cvA9KmLg7sY

_________________
bbbbbbbbbbbImage
bbbbbbbbbbb Be patient, English is not my language.


Top
 Post subject: Re: How to clean this picture
PostPosted: Sat Oct 05, 2013 6:47 am  (#29) 
Offline
GimpChat Member
User avatar

Joined: Apr 07, 2010
Posts: 14182
Excellent job every one. That last one looks just like a brand new photo.

_________________
Image


Top
Post new topic Reply to topic  [ 29 posts ]  Go to page Previous  1, 2

All times are UTC - 5 hours [ DST ]


* Login  


Powered by phpBB3 © phpBB Group